Electronic Signature (eSignature)
The Electronic Signature feature allows you to request recipients to sign PDF documents. Use this when a contract or document has been finalized and is ready for signatures.
Prerequisites
- The Administrator has granted you permission to send signature requests
- The final draft of the PDF document has been reviewed and uploaded to the File Manager
Requesting signatures only works in edit mode
How to Request a Signature
Step 1: Locate the Document
-
Locate the record containing the PDF document you wish to have signed
-
Put the record in Edit mode and click the File Manager tab
-
Find the folder location of the PDF document
-
Right-click the PDF document and select Request Signature. This opens the Request Signature page

Step 2: Configure Signature Placement
The Request Signature page has three main steps to begin a new signature process:
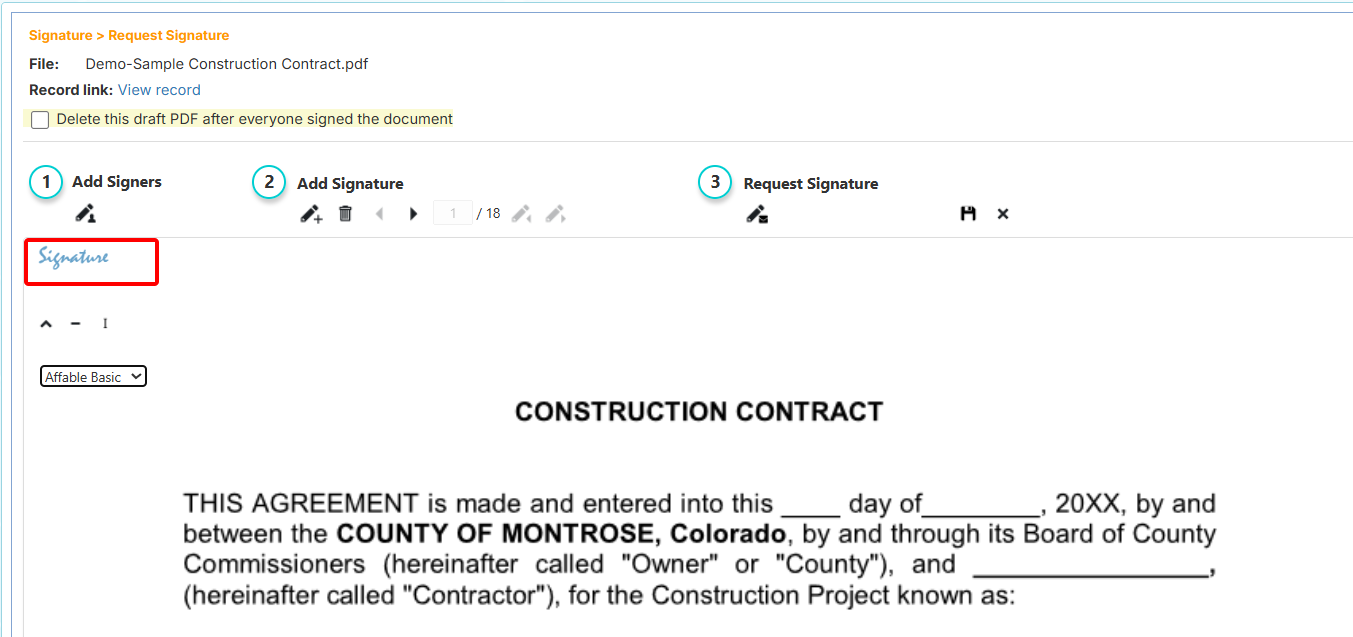
1. Add Signers
Click the icon beneath the Add Signers label to select the user(s) who will perform the signing process.
2. Add Signature Blocks
Creating a signature block:
-
Click the first icon underneath the Add Signature label to generate a new signature block
-
Click and drag from this button to place a signature block onto the page

Configuring the signature block:
Once you place a signature block, you can configure the following options:
- Down arrow – Expand/collapse the selected signer pane
- Minus button – Remove this signature block
- S or I button – Toggle between Signature or Initial block type
- Selected Signer dropdown – Choose which user must sign in this location
Resizing and positioning:
Click the signature block to hide the additional options panel. You can then:
- Drag the block to adjust its x and y coordinates
- Resize the block by dragging the corners to adjust width and height
Additional toolbar options:
- Trashcan icon – Remove all signatures in the document
- Left/Right arrows – Navigate between pages in the document
- Page Numbers – Shows current page out of total pages
- Pen left/right arrows – Navigate between signature blocks in the document
3. Request Signature
Click the icon under the Request Signature label to finalize the signature block placement and initiate the signature process for the specified users.
Additional actions:
- Save icon (floppy diskette) – Saves the signature configuration without initiating the signature process. You can retrieve this saved configuration later. The draft is automatically removed after the signature process completes.
- Cancel icon (X) – Cancels all changes made to signature blocks since the last save and exits the Request Signature page
How to Sign a Document
How to Access the Signature Request
Each selected signature user receives an email notification with a link to sign the document. The email is customized with your corporate branding (header and footer can be customized by a manager).
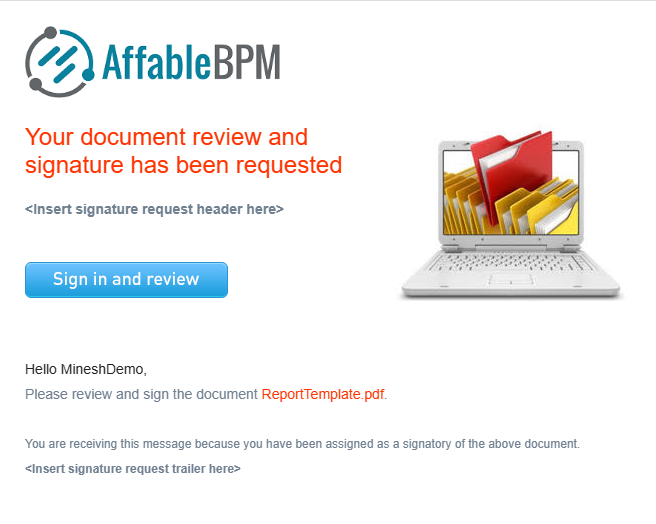
Users can access the document for signing by either:
-
Clicking the link in the email
-
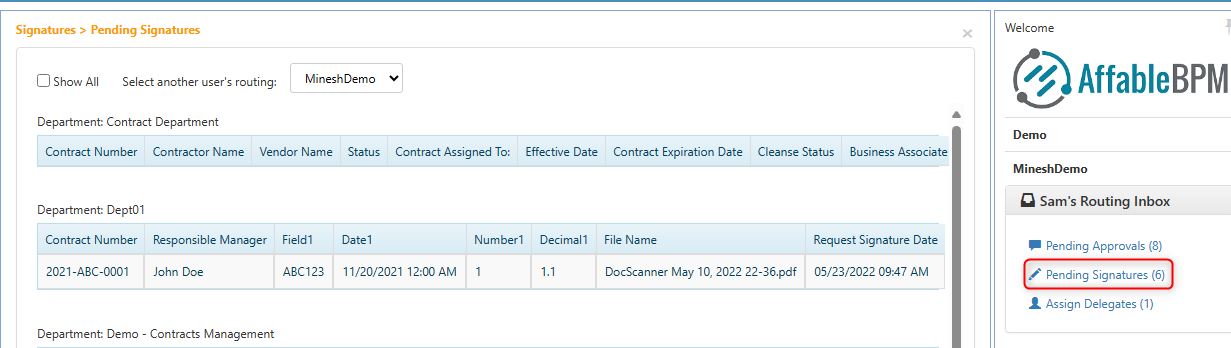
Navigating to Pending Signatures in the right panel of the workflow
How to Complete Your Signature
When in Sign mode, users follow three steps:
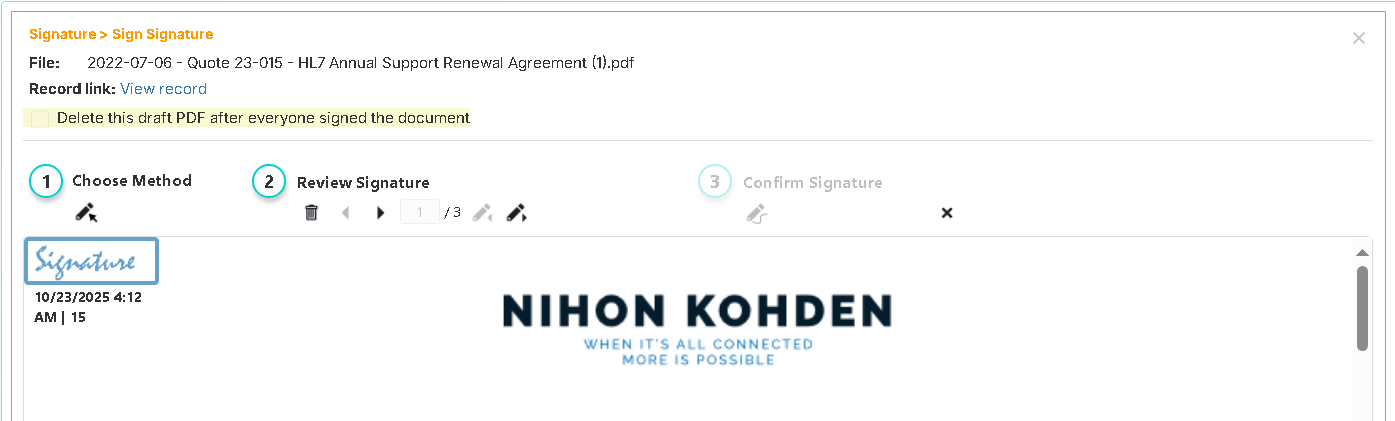
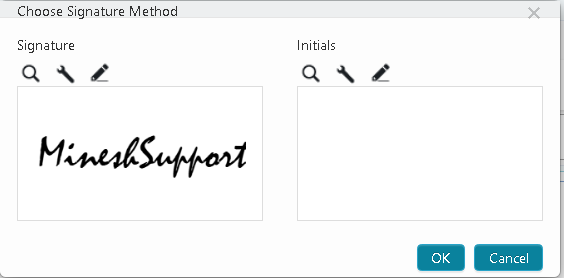
1. Choose Your Signature Method
Select your preferred signature method for signature and initial blocks:
-
Browse – Upload an image of your signature from your computer
-
Generate – Type your name to create an automatically generated signature
-
Draw – Use your mouse or pen tablet to draw your signature or initial
2. Review and Apply Your Signature
Navigating the document:
- Use the navigation icons to move through the document pages
- Use the pen icons to jump between signature blocks
Applying your signature:
- After setting your signature method, left-click on each signature block to apply your signature
- By clicking, you approve your signature at the specified location and time (this action is recorded in the audit log)
3. Confirm Your Signature
After you've approved all signature and initial blocks assigned to you:
-
The Confirm Signature step becomes enabled
-
Click the icon underneath the Confirm Signature label
-
Enter your password to confirm your signature

How to Decline a Signature Request
If you need to decline signing:
- Click the trash bin icon during the Review and Apply step
- Choose to either:
-
Transfer the signature request to another user and continue the process, or
-
Decline the signature for all users and end the request

-
What Happens After All Signatures Are Complete
After all signers complete the signature process and all blocks are approved:
- The signed signature blocks are applied to the document
- A new signed copy is placed in the File Manager under the Signed Documents folder
- Email notifications are sent to all signers and users subscribed to signature process approval notifications