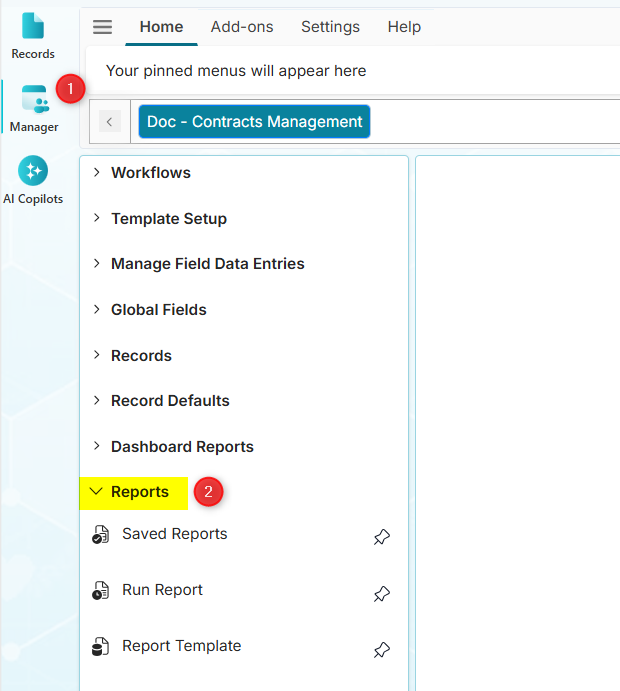
Reports
The Reports menu provides options for managing, regenerating, and customizing report output.
On This Page
- Saved Reports - List and manage your saved reports
- Run Report - Regenerate reports and automatically email them
- Report Template - Create custom report template layouts using HTML or MS Word documents
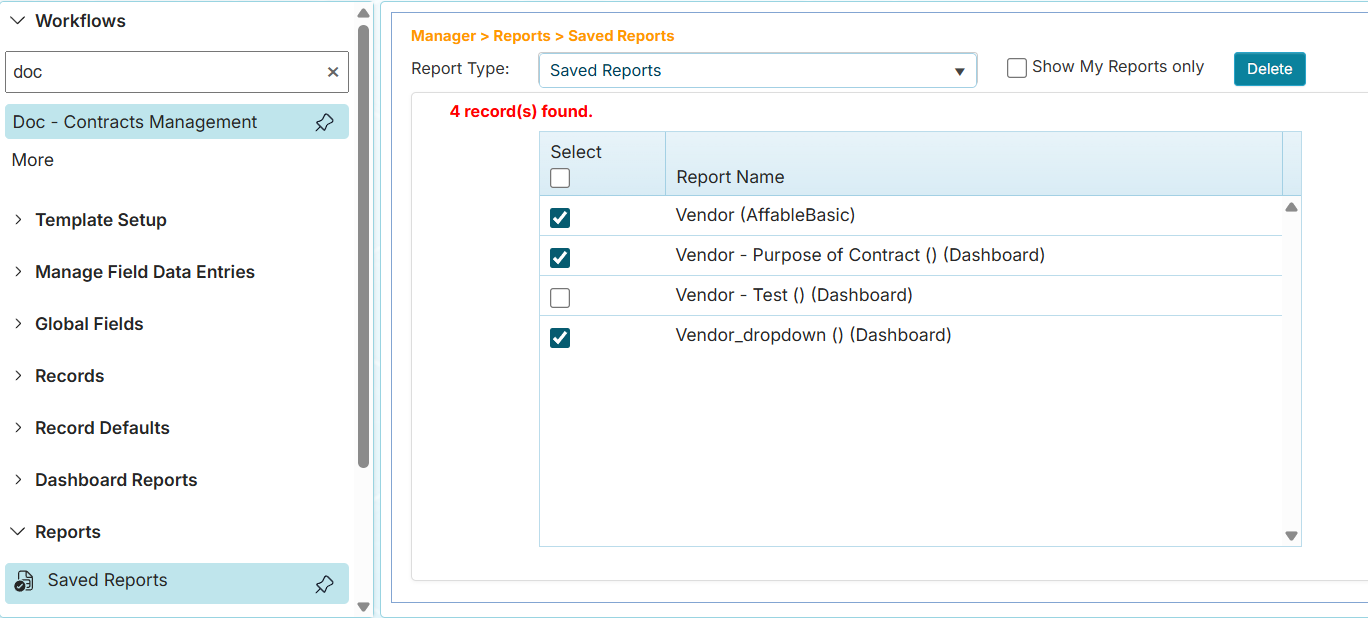
Saved Reports
The Saved Reports menu allows you to list and delete saved reports in a workflow. The Saved Reports page lists the name of the reports and who created them.
-
Report Type dropdown lists the saved and advanced reports.
-
Show My Reports checkbox lists only your own saved reports.
-
Delete button allows you to delete the checked reports.
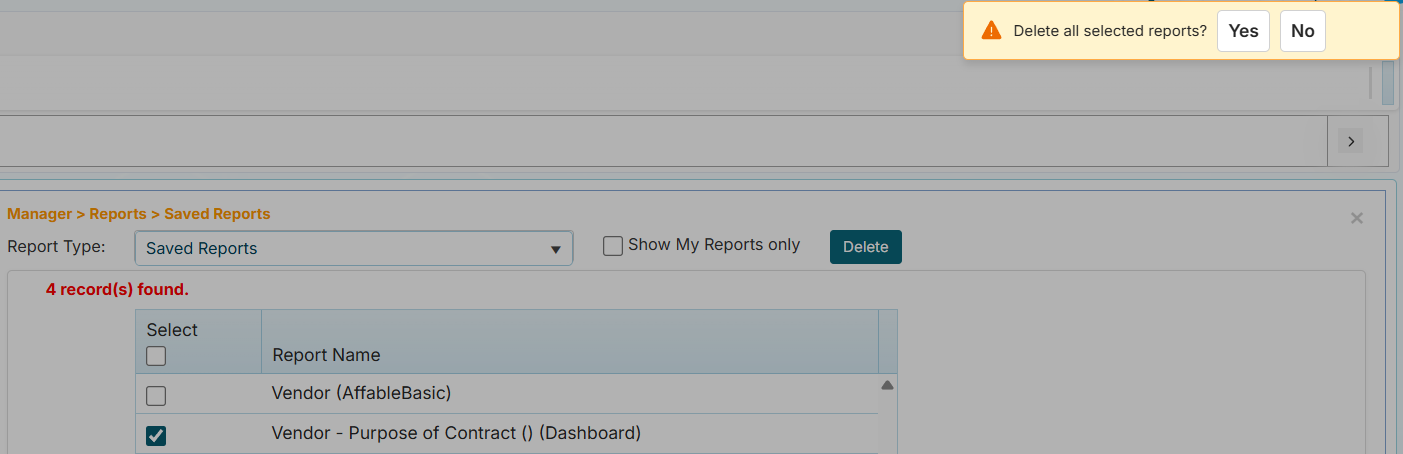
warningBe careful when deleting a report. This should be properly communicated with your team or report recipients. The report may have been configured to run in the Run Report schedule, and your recipients will be confused if they no longer receive the scheduled report email they are expecting.
info-
A confirmation message appears when deleting a report.
-
Deleting a report removes it from the Run Report schedule queue.
-
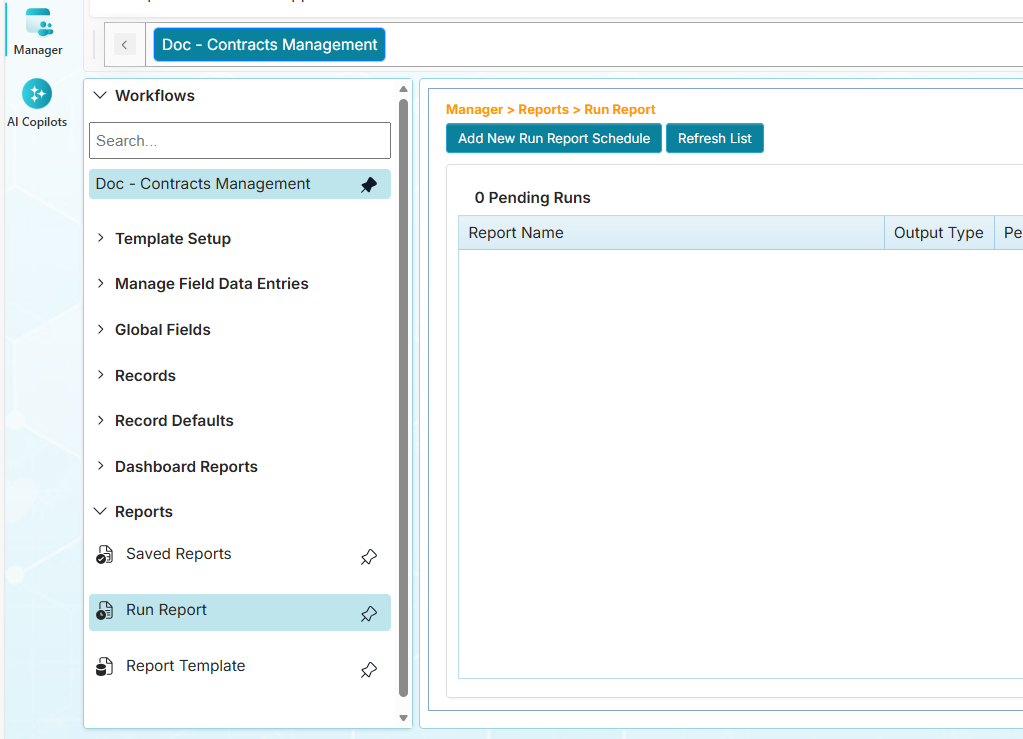
Run Report
The Run Report menu allows you to regenerate reports and email the output to users who have access to the workflow.
Run Report Schedule Types
You can schedule running reports using the following options:
- Immediate - Send the report immediately after generating it
- One-time - Send the report once on a specified date and time
- Recurring - Send the report repeatedly on a specified start and end date with more options (e.g., Daily, Weekly, Monthly, Yearly)
There must be an existing saved report before you can use this feature. These reports are those saved from Report Generation and Advanced Reports or reports saved as dashboards.
How to Add an Immediate Run Report Schedule
Use the Immediate Run Report type if you wish to generate a report and automatically send it to recipients who have access to the workflow.
-
On the sidebar, click the Manager menu.
-
Expand the Workflows section.
-
Click the workflow to which you want to add a new run report schedule.
-
Expand the Reports section menu.
-
Click the Run Report option.
-
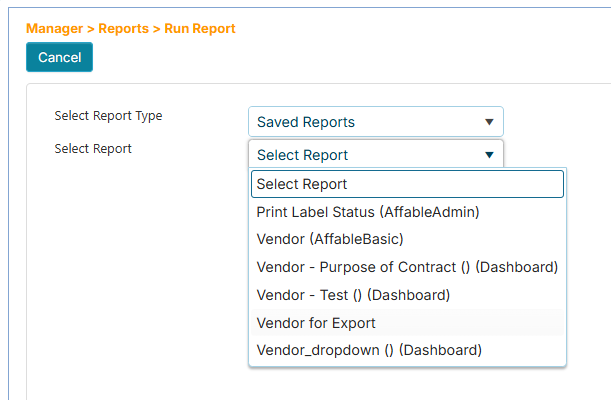
On the Run Report page, click the Add New Run Report Schedule button.
-
Click the Select Report Type dropdown, then select the type of report you want to run (e.g., Saved Reports).

-
Click the Select Report dropdown, then select the report.
-
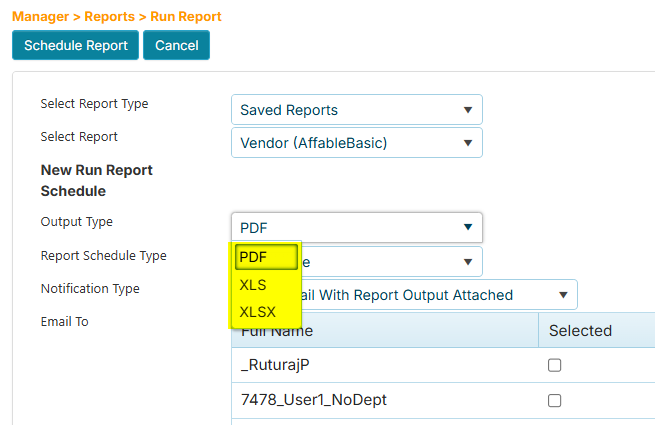
Click the Output Type dropdown, then choose the output format (e.g., PDF, XLS, XLSX).
-
Click the Report Schedule Type, then choose Immediate. The other options are One-time and Recurring.
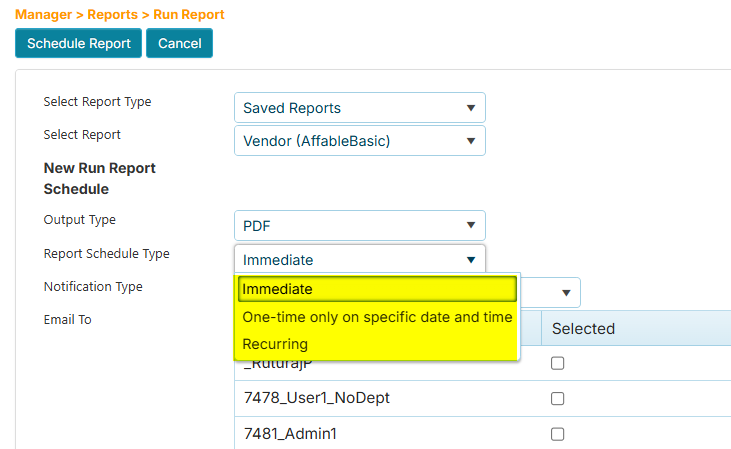
The Notification Type dropdown defaults to Send Email with Report Output Attached.
-
In the Email To listing, check the users who will receive the report.
-
In the Attachment Name box (optional), enter a new name for the report output.
-
In the Message box (optional), enter a message about the report.
-
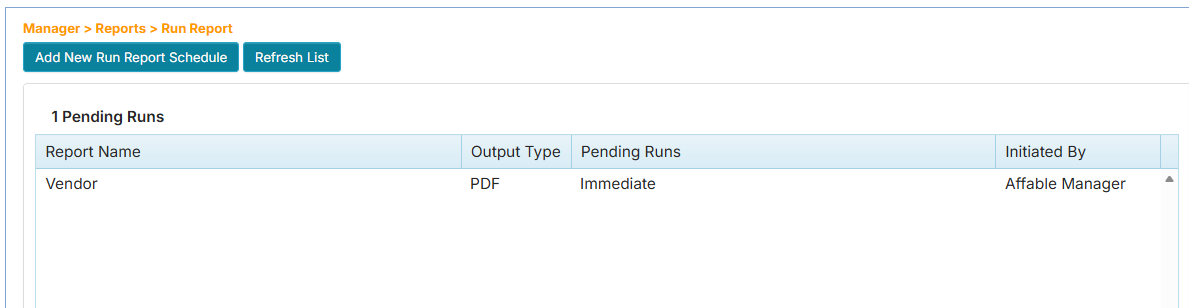
Click the Schedule Report button at the top to add the schedule. The new schedule will be added to the Run Report queue. The completion of the report may take some time depending on the number of scheduled reports in the list or the complexity of the report.
-
Click the Refresh List button to determine if the report has successfully generated and been sent. Completed reports will be removed from the list.
Report Template
The Report Template menu allows you to create customized report layouts using HTML or MS Word documents. The customized report contains field codes (placeholders) that correspond to the workflow fields. The field codes act as merge fields that are replaced with actual data when the report is generated. You can use the report template while viewing, editing, or removing a record, or in report generation. See How to Use the Report Template in Records and User Defined Report.
Choosing Your Template Format
Both HTML and Word templates support the same field codes and can pull data from your workflows. Choose the format that best fits how your report will be used and who will consume it.
HTML Report Templates
Best for: Single record reports with structured layouts and web-viewable content
Common Use Cases:
- Individual Contract Reports - Generate a formatted view of a single record with fields displayed in a clean, structured table layout
- Equipment Detail Sheets - Create a formatted display of specific equipment information with fields organized in tables
- Formatted Field Displays - Present selected fields from a specific record with custom CSS styling and precise table formatting
Key Benefits:
- Clean, structured layout with CSS styling for consistent formatting
- Renders instantly in email clients and browsers
- Can include company branding and custom styling
- Perfect for organizing fields in tabular format
- Ideal for single-record reports that need to be viewed online
Word Report Templates
Best for: Business correspondence, narrative reports, formal documents, and editable content
Common Use Cases:
- Contract Renewal Letters - Generate personalized letters using data from individual contract records, complete with company letterhead and signature blocks
- Service Notifications - Create formal letters to vendors or clients using record data, such as contract expiration notices or payment reminders
- Record-Based Certificates - Produce certificates or formal documents populated with data from specific records
- Custom Form Letters - Generate business correspondence that combines standard text with field data from individual records
Key Benefits:
- Natural document formatting with headers and footers
- Easy to include company letterhead and logos
- Recipients can edit or add notes if needed
- Supports rich formatting (bold, italics, bullet points)
- Familiar format for business correspondence
- Ideal for documents requiring physical or digital signatures
- Perfect for mixing narrative content with record data
Quick Comparison
| Feature | HTML Template | Word Template |
|---|---|---|
| Best for | Single record displays, structured field layouts | Letters, formal documents, narrative content |
| Layout | Structured, tabular | Flexible, document-style |
| Editing by Recipients | Not easily editable | User-friendly, familiar interface |
| Delivery Method | Embeds directly in email body | Sent as attachment |
| Primary Use | Record detail views, formatted field displays | Correspondence, certificates, form letters |
| Formatting Control | CSS-based styling | WYSIWYG formatting |
| Content Type | Field data in structured format | Mix of narrative text and field data |
| Signatures | Digital only | Physical or digital signatures supported |
How to Add an HTML Report Template
-
On the sidebar, click the Manager menu.
-
Expand the Workflows section.
-
Click your assigned workflow.
-
Expand the Reports section menu.
-
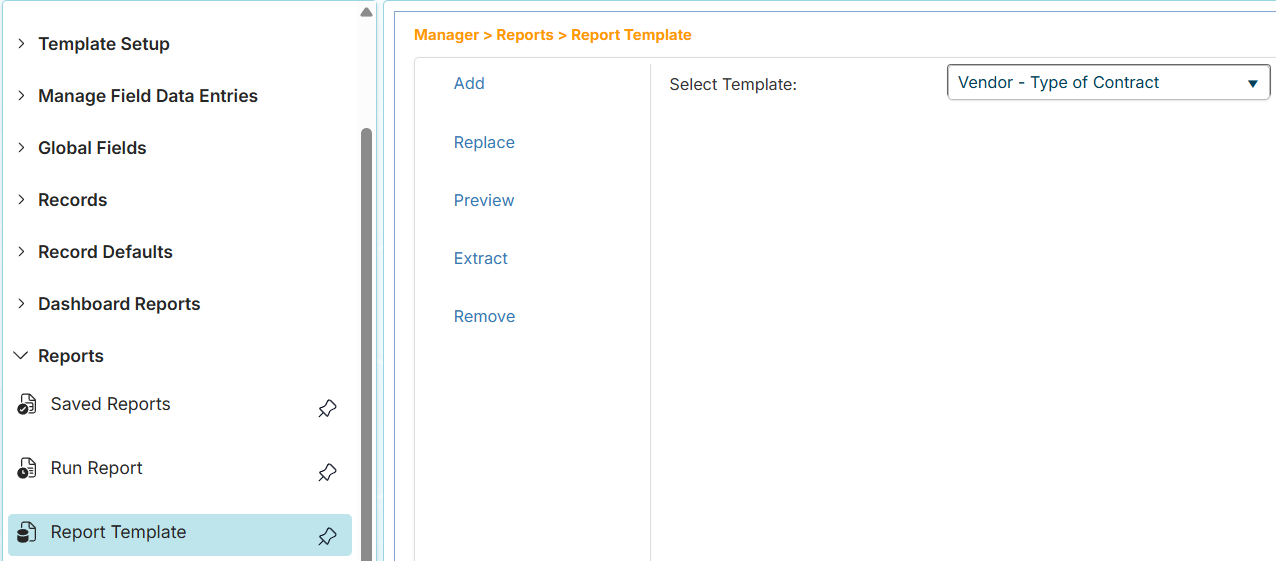
Click the Report Template menu.
-
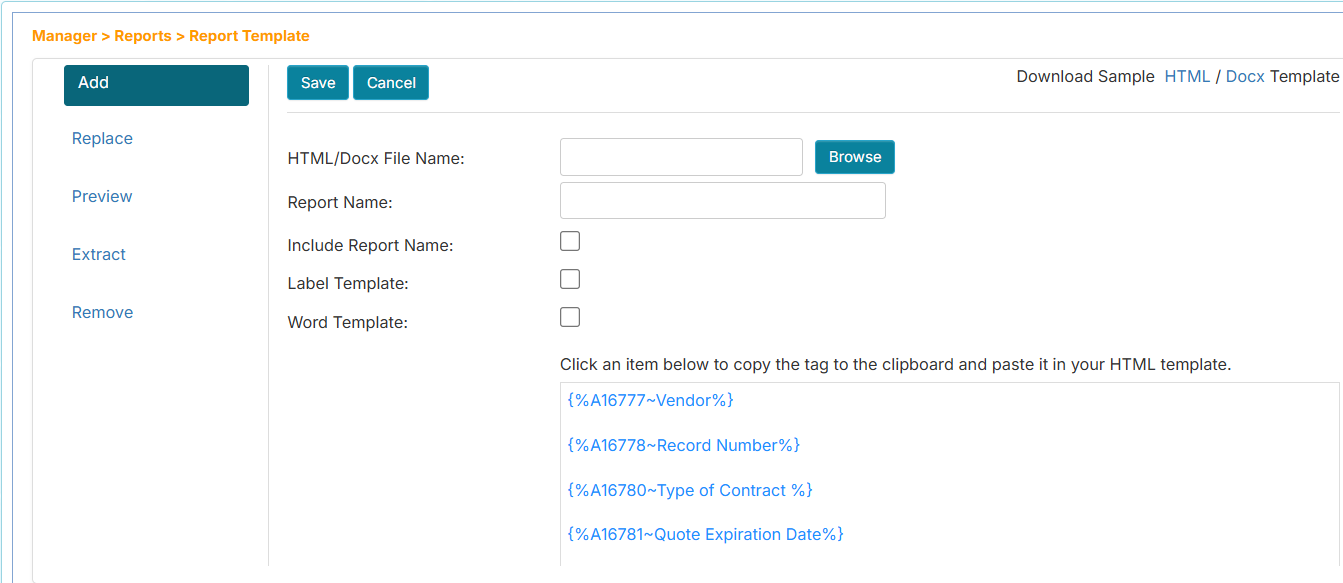
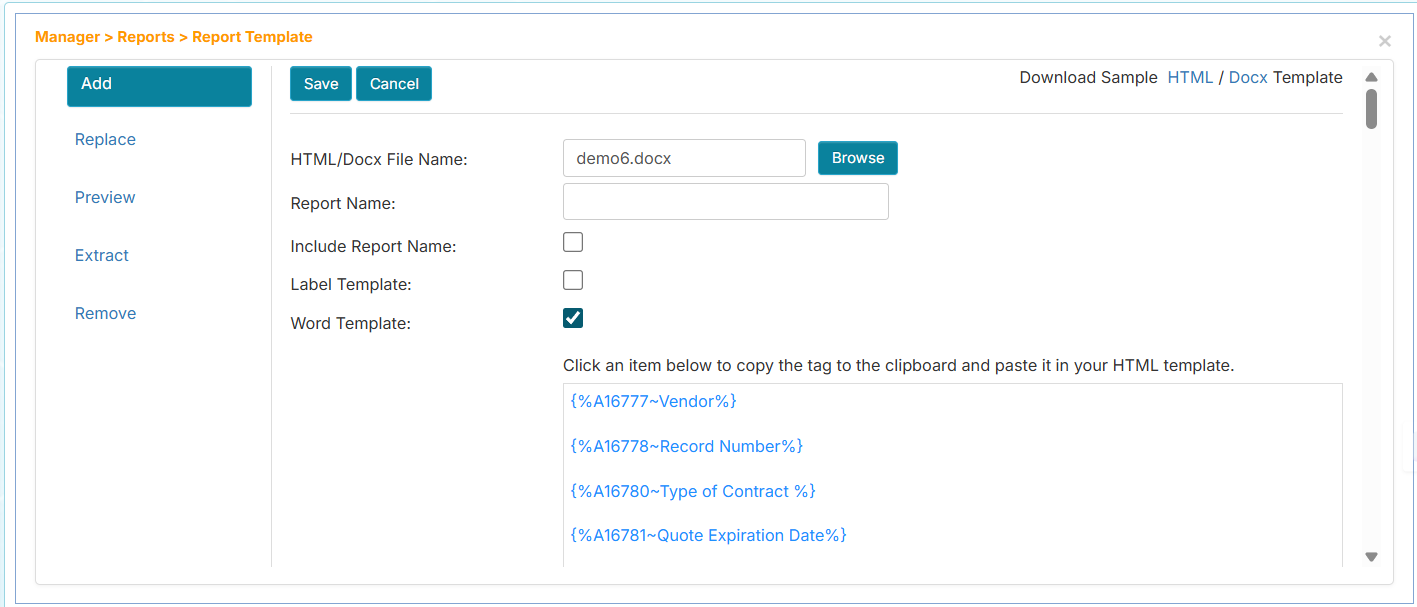
On the Report Template page, click the Add button. The field codes of the workflow will be listed below. At the top right, you will see the "Download sample HTML / Docx template" instruction.
-
Click the HTML link to download the sample HTML report template file. The HTML sample contains code showing how to format the layout of the template. It contains HTML tags: <table>, <tr>, <td> that are used to place the field labels and codes. You can learn more about these tags in HTML <table> Tag ↗.
-
Open the HTML file in a text editor. You should see the HTML tags as shown below. These tags tell the browser how to render the content.
   <!DOCTYPE html PUBLIC "-//W3C//DTD XHTML 1.0 Transitional//EN" "http://www.w3.org/TR/xhtml1/DTD/xhtml1-transitional.dtd">
   <html xmlns="http://www.w3.org/1999/xhtml">
     <head>
       <meta http-equiv="Content-Type" content="text/html; charset=utf-8" />
       <title>My Sample Report</title>
       <!-- Insert your custom CSS styles.-->
       <style type="text/css">
         body {
           font: 14px/20px Georgia, "Times New Roman", Times, serif;
         }
         h1 {
           font-weight: 200;
         }
         table {
           border-collapse: collapse;
           margin-top: 40px;
         }
         table td {
           padding: 4px 10px;
           border: 1px solid #ddd;
           color: #333;
         }
         div#content {
           margin: 30px 20px;
         }
       </style>
     </head>
     <body>
       <h1>Sample Contract Report</h1>
       <table>
         <tr>
           <td>Contract Number:</td>
           <!-- Insert the generated field tag that matches the field. -->
           <td>{%A4~Contract Number%}</td>
         </tr>
         <tr>
           <td>Contract Amount:</td>
           <!-- Insert the generated field tag that matches the field. -->
           <td>{%A1511~Contract Amount%}</td>
         </tr>
         <tr>
           <td>Contracts Manager:</td>
           <!-- Insert the generated field tag that matches the field. -->
           <td>{%A35~Contracts Manager%}</td>
         </tr>
       </table>
     </body>
   </html>
-
The comment tag is not interpreted by the browser (e.g.,
<!-- Insert the generated field -->). It serves as a note for a particular section of the HTML code. You can modify this. -
The tags for the field label and value are the ones you need to replace. For example:
   <td>Contract Number:</td>
<td>{%A4~Contract Number%}</td> -
The
<td>Contract Number:</td>is a field label example that will be rendered—in this case, Contract Number: -
The
{%A4~Contract Number%}is a field code placeholder example that should be replaced with the appropriate field code from the selected workflow.
-
Go back to the Report Template page and click the field code you wish to use in the HTML.
-
Back in the HTML editor, paste the field code inside the field code placeholders.
-
Enter the appropriate label for the selected field code.
-
Repeat steps 9 to 11 for additional fields you wish to use. Below is an example of a modified report template:
    <body>
        <h1>Sample Contract Report</h1>
        <table>
            <tr>
                <td>Vendor:</td>
                <td>{%A16777~Vendor%}</td>
            </tr>
            <tr>
                <td>Type of Contract:</td>
                <td>{%A16780~Type of Contract%}</td>
            </tr>
            <tr>
                <td>Purpose of Contract:</td>
                <td>{%A16782~Purpose of Contract%}</td>
            </tr>
        </table>
</body> -
Once done, save the HTML file. You may rename the HTML file to help you identify its use.
-
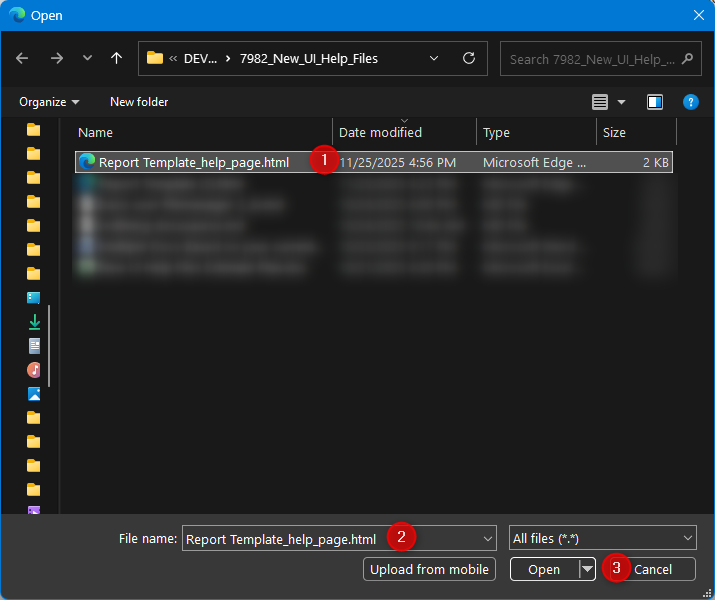
On the Report Template page, click the Browse button.
-
Locate your HTML file and choose Open from the file upload window. The application will upload and validate the file. The HTML/Docx File Name box will be auto-filled with your HTML file name.
-
Fill in the Report Name box.
-
Set the appropriate settings for the report template. See Report Template Settings.
-
Click the Save button once done.
-
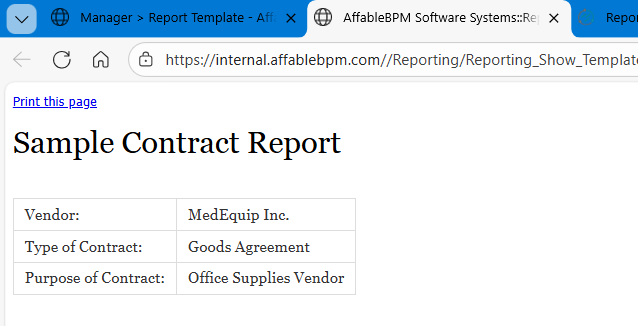
(Optional) From the Select Template dropdown, choose the report template, then click the Preview button. The preview will be displayed in a new browser tab. Learn more about the Report Template Options.
How to Add an MS Word Report Template
-
On the sidebar, click the Manager menu.
-
Expand the Workflows section.
-
Click your assigned workflow.
-
Expand the Reports section menu.
-
Click the Report Template menu.
-
On the Report Template page, click the Add button. The field codes of the workflow will be listed below. At the top right, you will see the "Download sample HTML / Docx template" instruction.
-
Click the Docx link to download the sample MS Word report template file.
-
Open the MS Word template file. It will contain sample placeholders for the field codes that you can replace. The field codes can be placed anywhere in the file, and the application will automatically replace these with the actual values from the selected fields.
   [Insert date here]

   {%A2325~Vendor Name^A217~Vendor Name%}
   {%A2325~Vendor Name^A218~Address%}
   {%A2325~Vendor Name^A219~City%}, {%A2325~Vendor Name^A220~State%}
   {%A2325~Vendor Name^A221~Zip%}

   OBJECT: EXPIRATION OF SERVICE CONTRACT

   Dear {%A35~Contracts Manager%},
   Our records indicate that your Service and Support Contract with us will expire on {%A44~Contract Expiration Date%}. A Renewal Agreement is enclosed to ensure your uninterrupted service and support. Please sign and return it away.
   Lorem ipsum dolor sit amet, consectetur adipiscing elit, sed do eiusmod tempor incididunt ut labore et dolore magna aliqua. Ut enim ad minim veniam, quis nostrud exercitation ullamco laboris nisi ut aliquip ex ea commodo consequat.
   Duis aute irure dolor in reprehenderit in voluptate velit esse cillum dolore eu fugiat nulla pariatur. Excepteur sint occaecat cupidatat non proident, sunt in culpa qui officia deserunt mollit anim id est laborum.

   Sincerely,
   John Ramos
   CFO/Awesome Corp.
   jramos@awesomecorp.com
-
Replace the content with your preferred wording and click the field codes from the Report Template page.
-
Pick a location anywhere in the Word document and paste it.
-
Save the document.
-
Back on the Report Template page, click the Browse button and locate the MS Word document.
-
Click the Open button. The application will upload and validate the file. The HTML/Docx File Name box will be auto-filled with your MS Word filename.
-
Fill in the Report Name box.
-
Set the appropriate settings for the report template. See Report Template Settings.
-
Click the Save button once done.
Report Template Settings
Here are additional settings when adding or updating a report template:
- Report Name - This is used in the record's Print Template menu dropdown and in the Report Generation page's User Defined Report dropdown.
- Include Report Name - Check this if you wish to use the Report Name in report generation.
- Label Template - Check this if you wish to make it a Print Label report template.
- Word Template - Check this if your report template is created from a Word document.
Report Template Options
Here are additional actions for managing the report template.
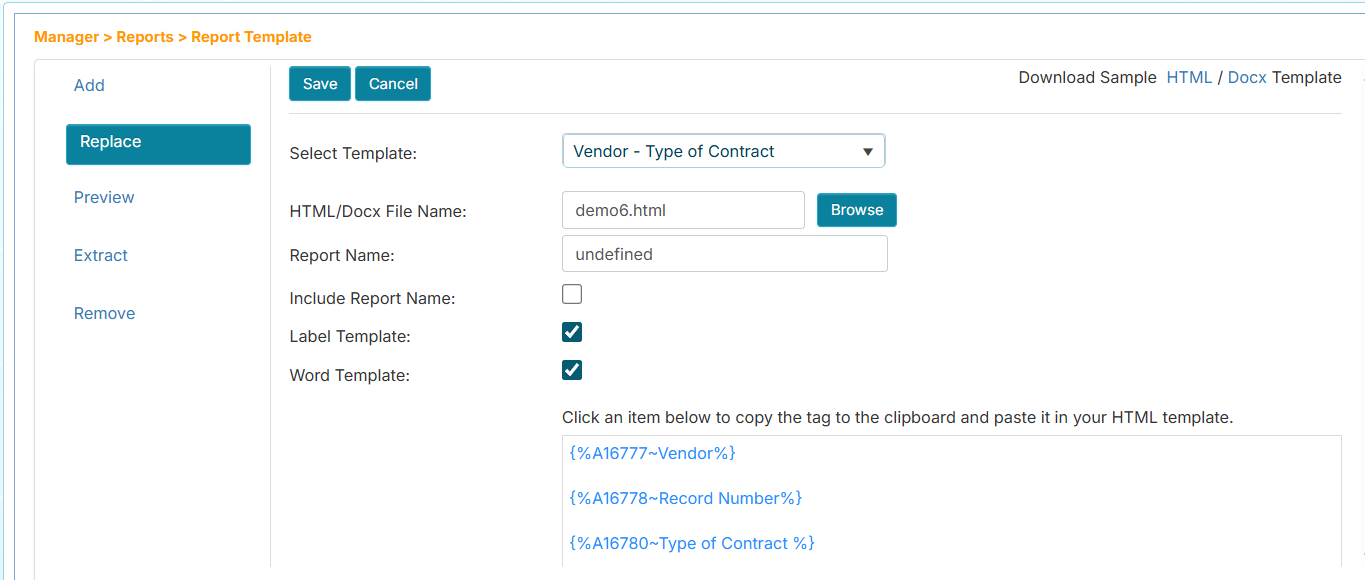
- Replace - Allows you to replace your report template.
- Preview - Allows you to preview the report output in another browser tab.
- Extract - Allows you to download the report template.
- Remove - Allows you to delete the report template.
How to Use the Report Template in Records
Once a report template is defined, you can use it while viewing, editing, or removing a record, or in report generation.
See also:
Steps:
- On the sidebar, click the Records main tab.
- Expand the Workflows listing and click your assigned workflow.
- Expand the Records section menu and click View. You can also choose Edit or Remove.
- Click any record from the record listing.
- Click the Record Options dropdown, then choose Print Template. Learn more about Record Options in Record Options Dropdown.
- In the Print Template window, click the report template. A new browser tab will display the extracted field values using the report template. If the report template is a Word version, it will be downloaded.