Data Entries
Introduction
The Manage Field Data Entries feature allows you to manage the values of list fields such as dropdown, dropdown box/back, selection box, and selection box/back. See field types in Define Fields.
You will learn:
- Single Field - Use this menu to manage the values of single field dropdowns and selection boxes.
- Multi Field - Use this menu to manage the values of list fields that contain subfields (Dropdown Box/Back and Selection Box/Back field types). The terms "Multi field" and "Background field" can be used interchangeably.
- Sub Single Field - Use this menu to manage the values of a child dropdown field. For example, if a multi field dropdown has a child dropdown field, you will use this menu to manage the values of the child dropdown.
- Sub Multi Field - Use this menu to manage the values of a child dropdown field that contains subfields.
Single Field
The Single Field menu allows you to add, edit, remove, or archive values from single field dropdown or selection box fields.
Manage Single Field Lists:
In the following guides, if you are already on the Single Field page, you can skip to step 4.
- How to Add a New Single Field Entry
- How to Edit a Single Field Entry
- How to Delete a Single Field Entry
- How to Archive a Single Field Entry
How to Add a New Single Field Entry
-
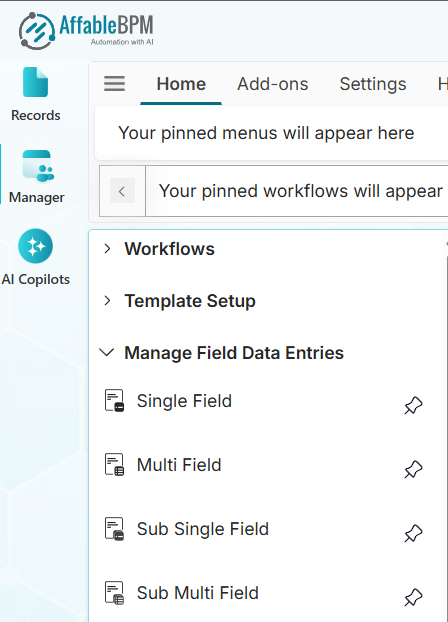
From the Manager sidebar tab, click Manage Field Data Entries.
-
Click the Single Field menu.
-
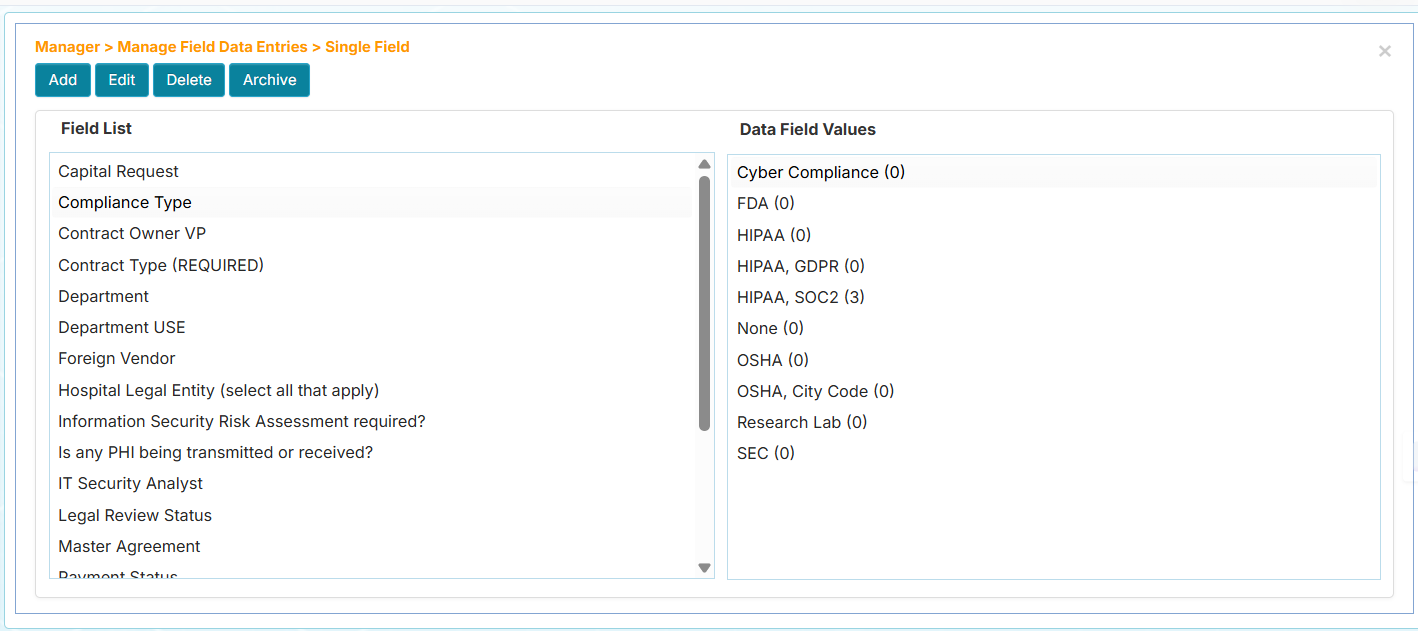
Expand the Workflows menu and click your assigned workflow. The Field List panel will display the field names of dropdown or selection box fields on the left side.
-
Click the field name.
-
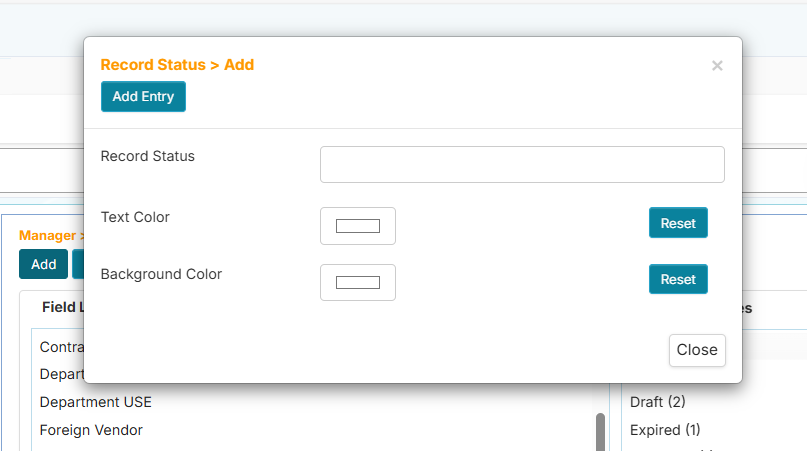
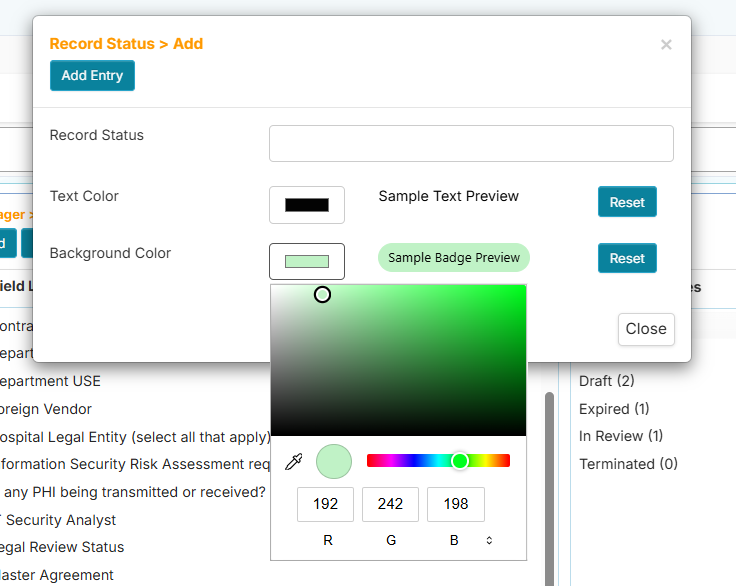
Click the Add button. A window will appear for entering a new value. You will see optional color settings for the text and background color.
 info
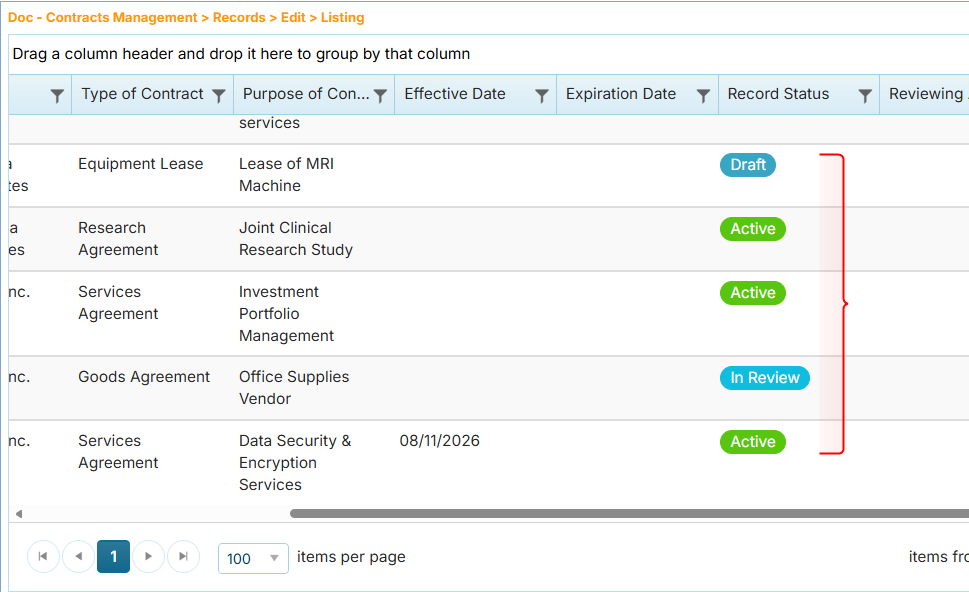
infoThe color setting allows you to apply a distinct visual indicator for each value when displayed in the record listing. For example, the image below shows the Record Status column (dropdown field) that lists the values in different colors.
-
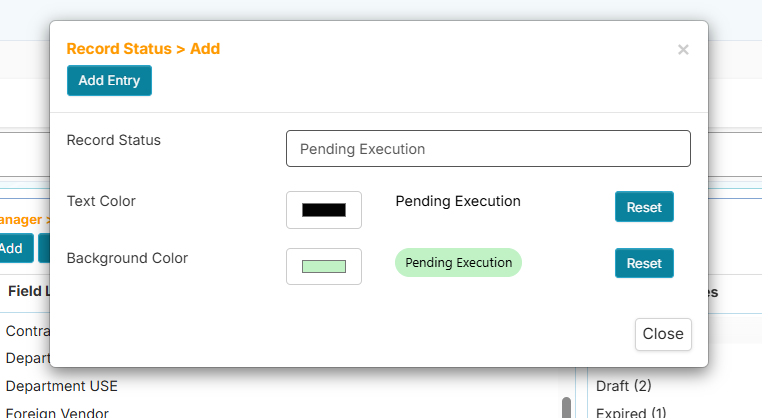
In the add box, enter a new value.
-
(Optional) Click the Text Color box, drag your mouse in the color selection area, then click your preferred color.

-
(Optional) Click the Background Color box, drag your mouse in the color selection area, then click your preferred color.
You should see the final appearance like this:
-
Click the Add Entry button when done.
You can also add new entries while the record is in add or edit mode if non-managers have been allowed to do so. See Workflow Settings's Dropdown Fields.
How to Edit a Single Field Entry
-
From the Manager sidebar tab, click Manage Field Data Entries.
-
Click the Single Field menu.
-
Expand the Workflows menu and click your assigned workflow. The Field List panel will display the field names of dropdown or selection box fields on the left side.
-
Click the field name.
-
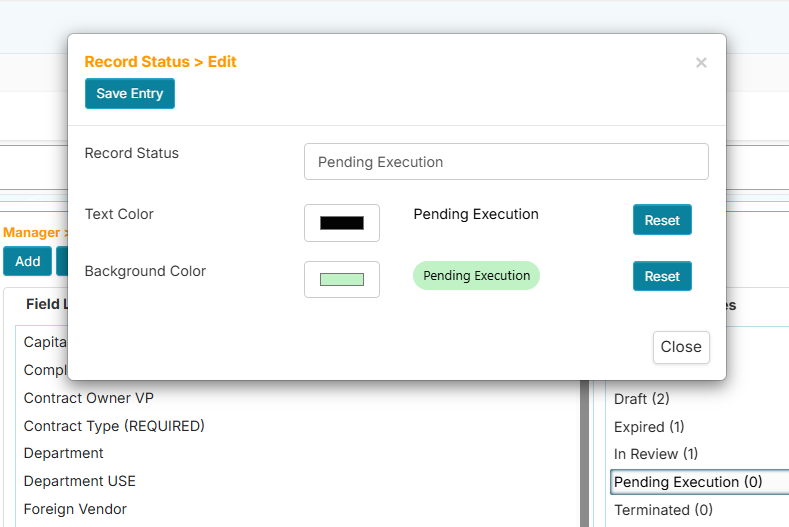
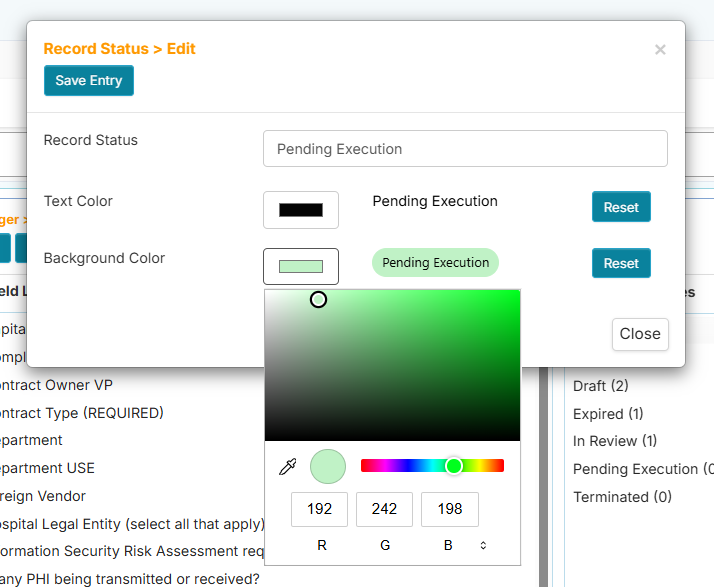
On the Data Field Values panel, double-click the value or click the value then click the Edit button. The Edit entry window will appear.
-
Enter the new value.
-
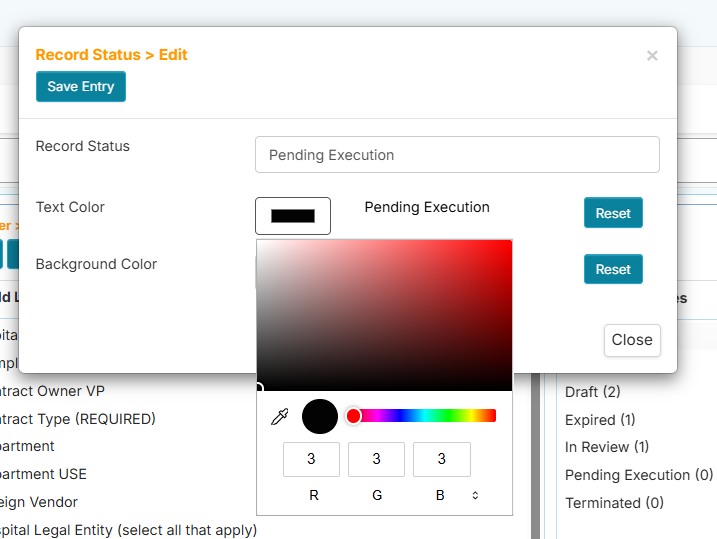
(Optional) Click the Text Color box, drag your mouse in the color selection area, then click your preferred color.
-
(Optional) Click the Background Color box, drag your mouse in the color selection area, then click your preferred color.
-
Click the Save Entry button when done.
How to Delete a Single Field Entry
-
From the Manager sidebar tab, click Manage Field Data Entries.
-
Click the Single Field menu.
-
Expand the Workflows menu and click your assigned workflow. The Field List panel will display the field names of dropdown or selection box fields on the left side.
-
Click the field name.
-
On the Data Field Values panel, find a value with the suffix (0).
tipOnly values with a (0) suffix can be deleted. This means there are no records using this value and it is safe to delete.
-
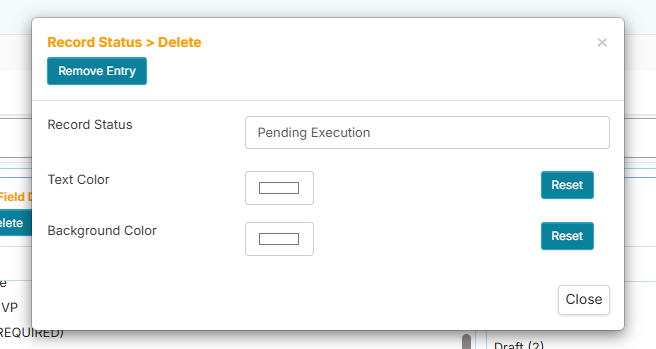
Click the Delete button. The Delete entry window will appear.
-
Click the Remove Entry button. A confirmation message will appear.
-
Click Yes to proceed or click No to cancel.
How to Archive a Single Field Entry
Archiving a single field entry means it will not be included in the list of values when viewed in the record.
Steps:
-
From the Manager sidebar tab, click Manage Field Data Entries.
-
Click the Single Field menu.
-
Expand the Workflows menu and click your assigned workflow. The Field List panel will display the field names of dropdown or selection box fields on the left side.
-
Click the field name.
-
On the Data Field Values panel, double-click the value or click the value then click the Edit button. The Edit entry window will appear.
-
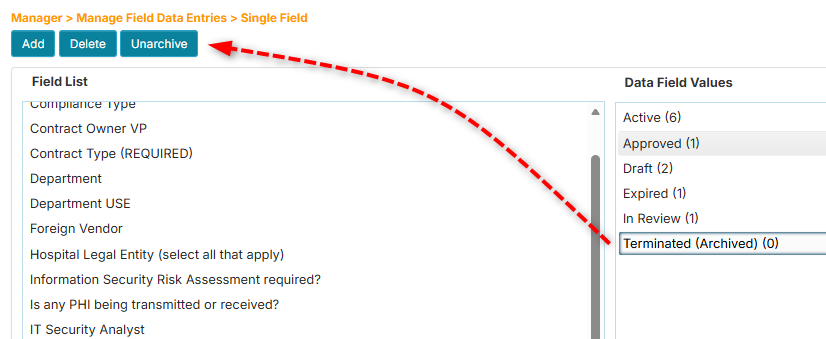
Click the Archive button. The value will have an (Archived) annotation to indicate its status.
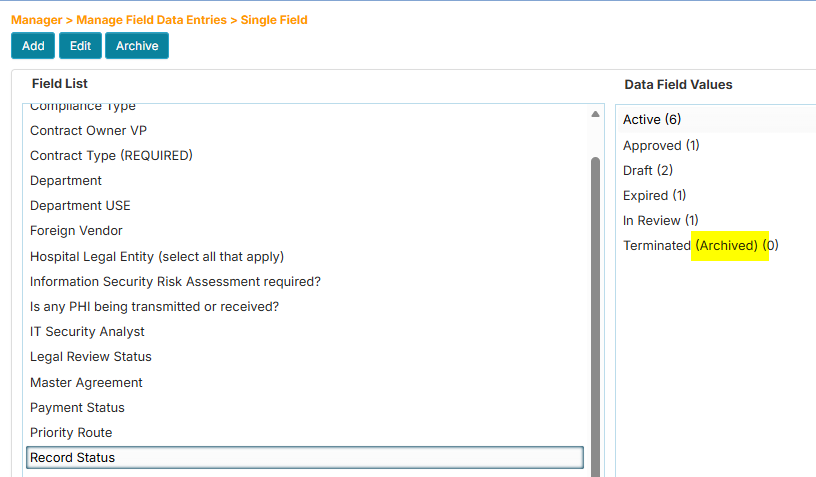
If you wish to restore it, you can click the Unarchive button.
Multi Field
The Multi Field menu allows you to add, edit, remove, or archive values from list fields that contain subfields (Dropdown Box/Back, Selection Box/Back, or Recurring Fields).
Manage Multi Field Lists:
In the following guides, if you are already on the Multi Field page, you can skip to step 4.
- How to Add a New Multi Field Entry
- How to Edit a Multi Field Entry
- How to Delete a Multi Field Entry
- How to Archive a Multi Field Entry
How to Add a Multi Field Entry
-
From the Manager sidebar tab, click Manage Field Data Entries.
-
Click the Multi Field menu.
-
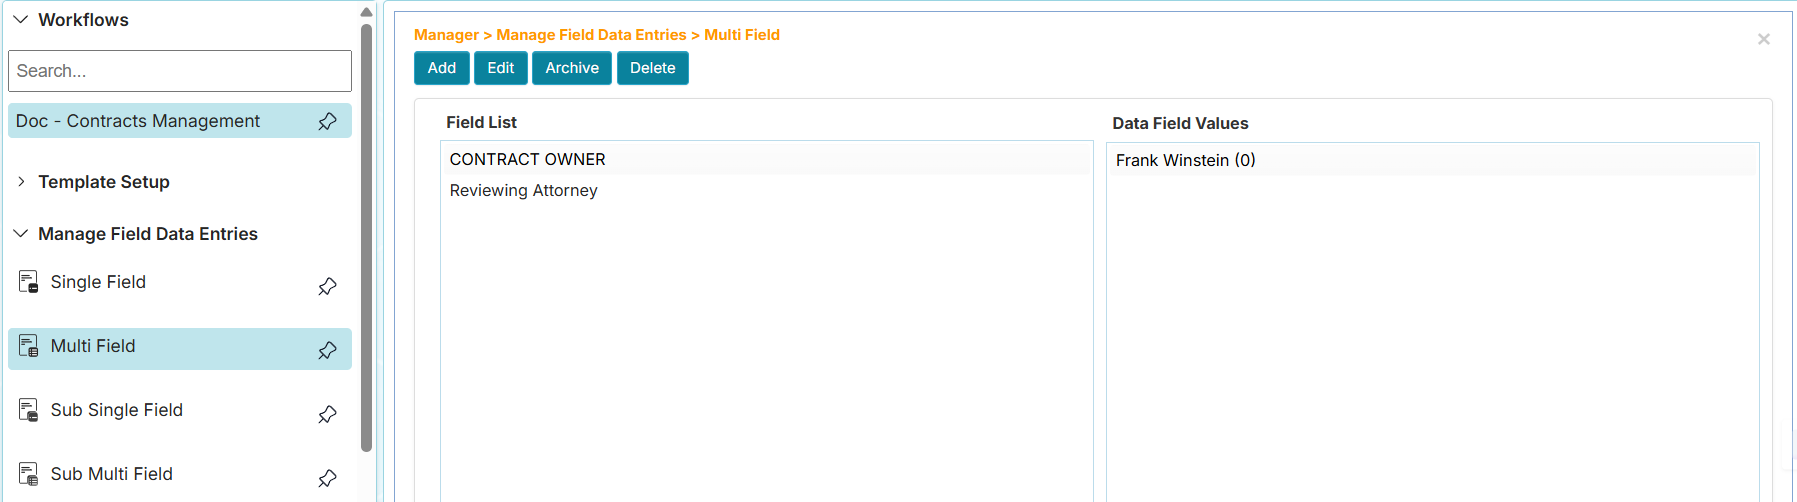
Expand the Workflows menu and click your assigned workflow. The Field List panel will display the names of list fields that contain subfields.
-
Click the field name.
-
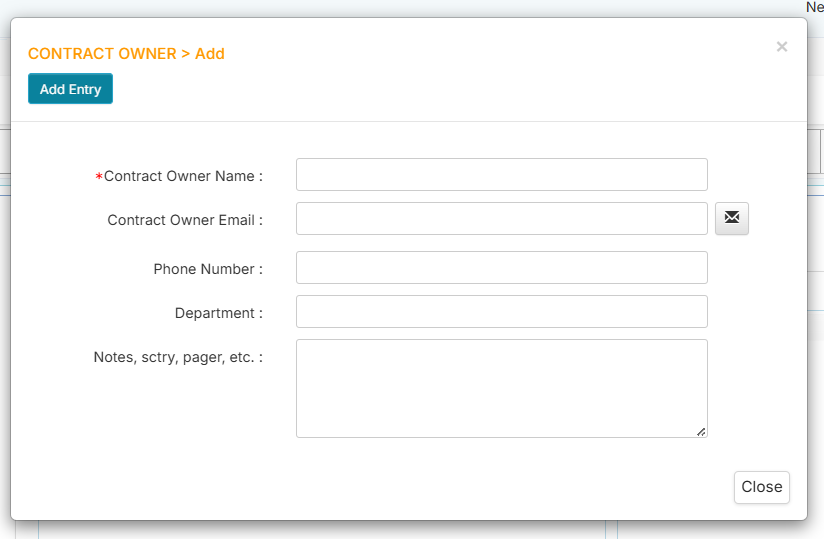
Click the Add button. A window will appear for entering a new set of subfield values. For example, the screenshot below shows the subfields of the selected field.
 info
info- Fields that are defined as required will be prefixed with the star (*) symbol.
- The first subfield will be used to display the values of a multi field list.
IMPORTANTThe first subfield should be a Free Text type to properly display the values of a multi field list.
-
Enter the values then click the Add Entry button.
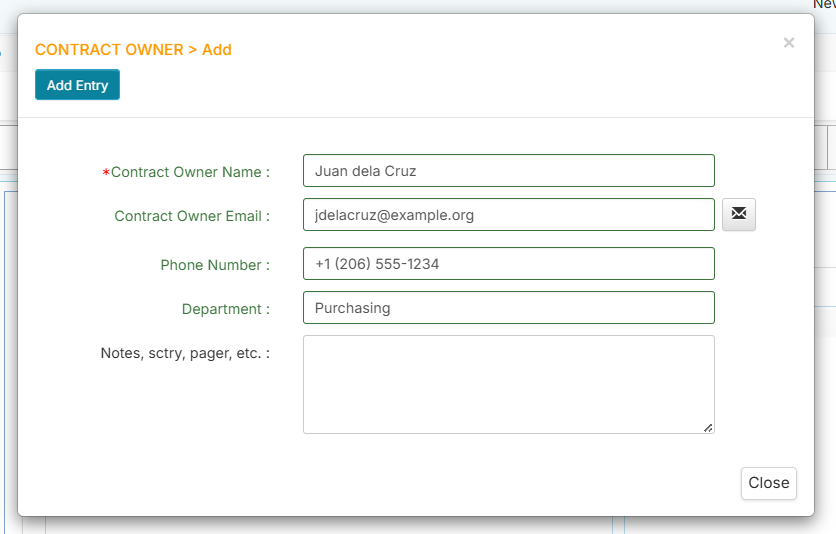
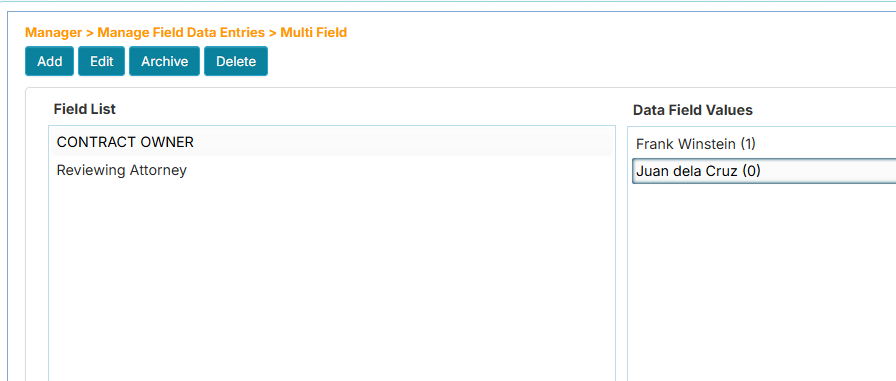
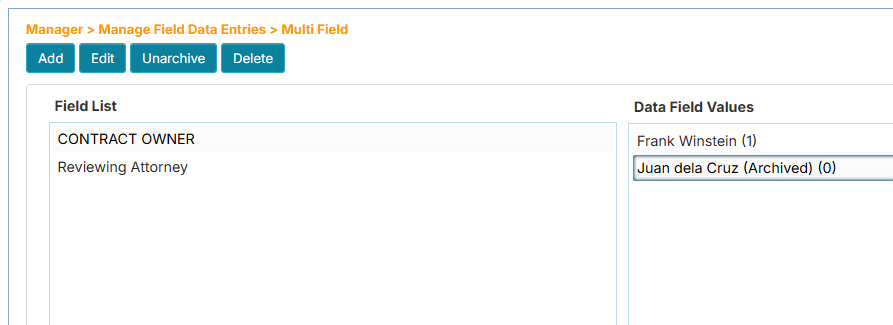
The first subfield value will be used to display the value.
 info
info- A newly added entry will have a (0) suffix. This means there are no records that use this value.
- You cannot delete a non-zero value.
How to Edit a Multi Field Entry
-
From the Manager sidebar tab, click Manage Field Data Entries.
-
Click the Multi Field menu.
-
Expand the Workflows menu and click your assigned workflow. The Field List panel will display the names of list fields that contain subfields.
-
Click the field name.
-
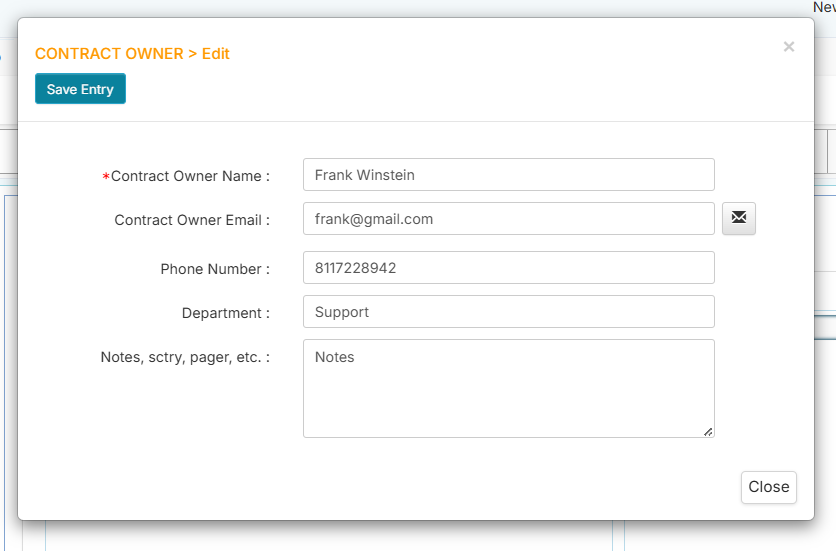
On the Data Field Values panel, double-click the value or click the value then click the Edit button. The Edit entry window will appear.
-
Enter the new values then click the Save Entry button when done.
How to Delete a Multi Field Entry
-
From the Manager sidebar tab, click Manage Field Data Entries.
-
Click the Multi Field menu.
-
Expand the Workflows menu and click your assigned workflow. The Field List panel will display the names of list fields that contain subfields.
-
Click the field name.
-
On the Data Field Values panel, find a value with the suffix (0).
 tip
tipOnly values with a (0) suffix can be deleted. This means there are no records using this value and it is safe to delete.
-
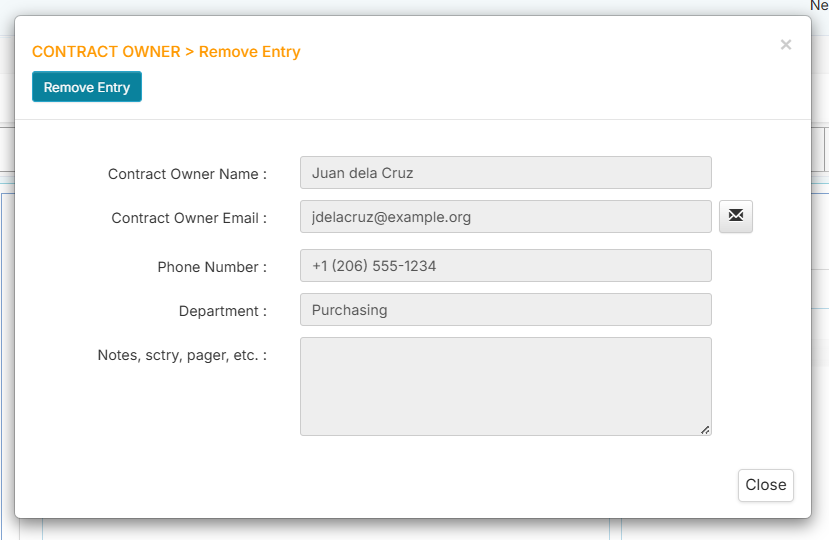
Click the Delete button. The Delete entry window will appear.
-
Click the Remove Entry button. A confirmation message will appear.
-
Click Yes to proceed or click No to cancel.
How to Archive a Multi Field Entry
Archiving a multi field entry means it will not be included in the list of values when viewed in the record.
Steps:
-
From the Manager sidebar tab, click Manage Field Data Entries.
-
Click the Multi Field menu.
-
Expand the Workflows menu and click your assigned workflow. The Field List panel will display the field names of list fields that contain subfields.
-
Click the field name.
-
On the Data Field Values panel, double-click the value or click the value then click the Edit button. The Edit entry window will appear.
-
Click the Archive button. The value will have an (Archived) annotation to indicate its status.
If you wish to restore it, you can click the Unarchive button.
Sub Single Field
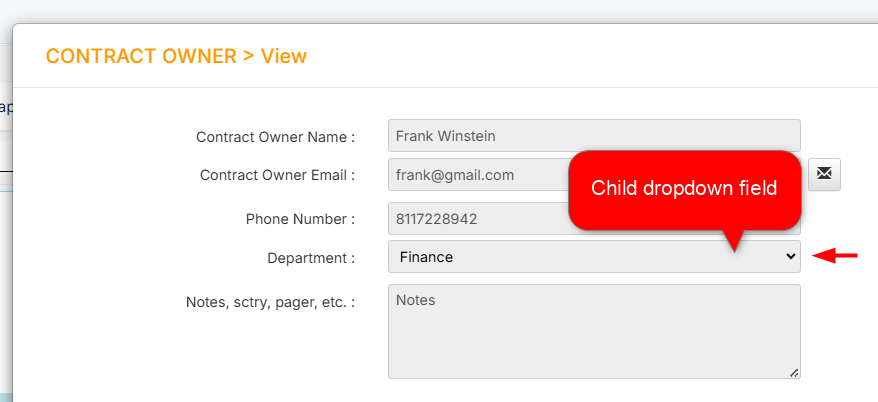
The Sub Single Field menu allows you to add, edit, or remove values from a child dropdown that contains only one field. This child dropdown field can be a subfield of a dropdown box/back, selection box/back, or recurring field. Below is an example of a dropdown box/back field and its child dropdown.
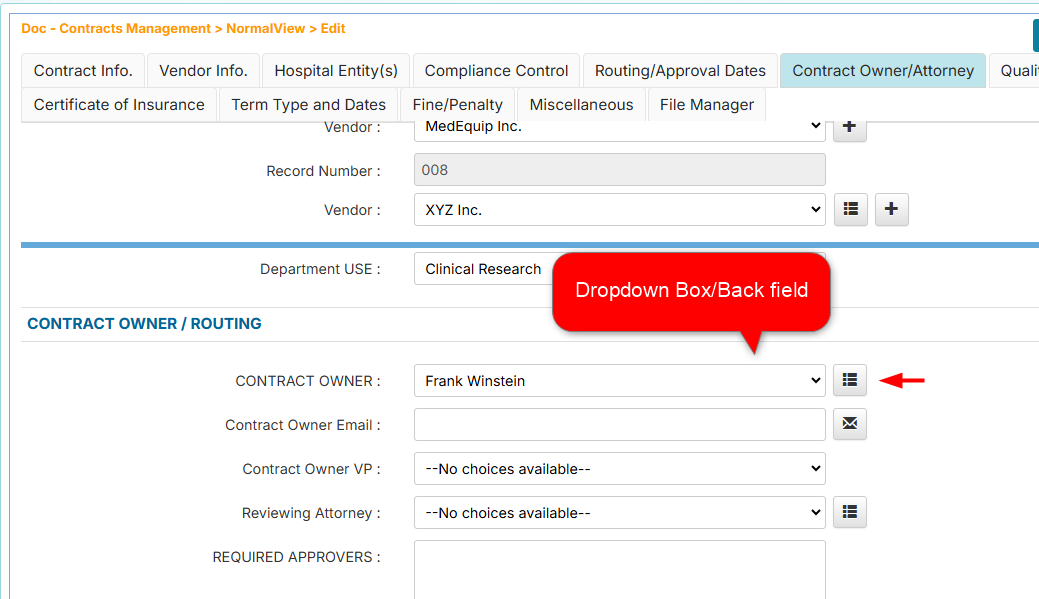
Clicking the dropdown's View Entry button will reveal the child dropdown field (if there is one).
Learn more about adding child fields in How to Add a Dropdown with Background Fields.
Manage Sub Single Field Lists:
In the following guides, if you are already on the Sub Single Field page, you can skip to step 4.
- How to Add a New Sub Single Field Entry
- How to Edit a Sub Single Field Entry
- How to Delete a Sub Single Field Entry
How to Add a New Sub Single Field Entry
-
From the Manager sidebar tab, click Manage Field Data Entries.
-
Click the Sub Single Field menu.
-
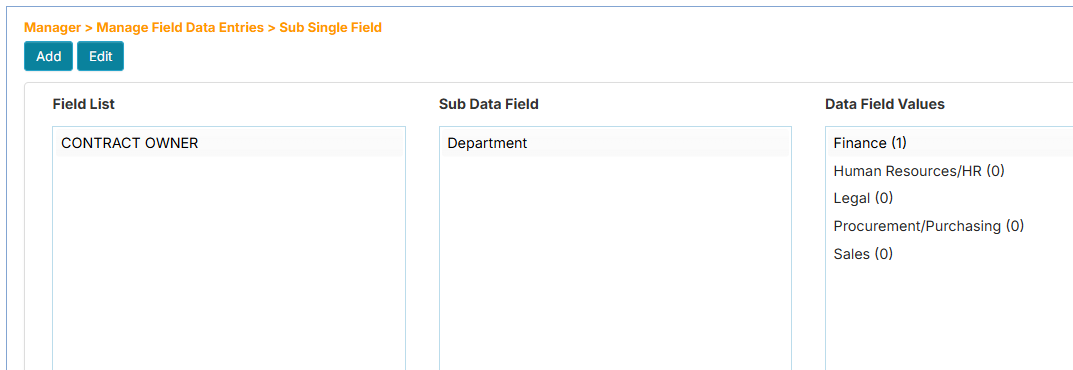
Expand the Workflows menu and click your assigned workflow. On the Sub Single Field page, the Field List panel will list all names of dropdown box/back, selection box/back, or recurring fields of the workflow.
-
Click the field name from the Field List panel.
-
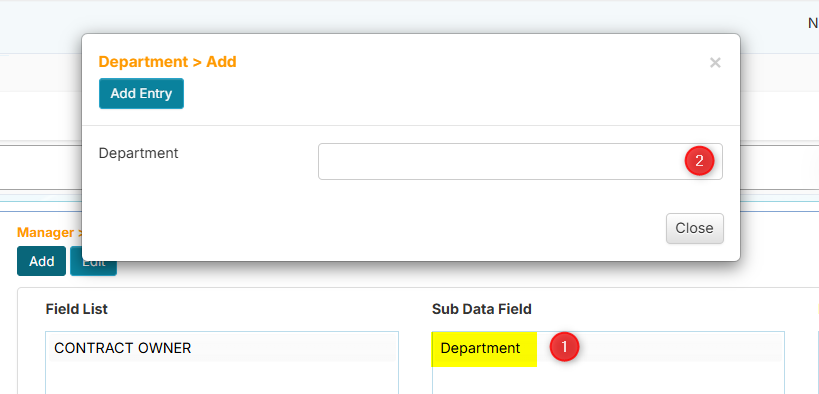
Click the subfield name from the Sub Data Field panel.
-
Click the Add button. The add window will appear.
-
Add the new entry then click the Add Entry button. The new item will be added and will have the suffix (0). This means the new entry has not been assigned to any record yet.
How to Edit a Sub Single Field Entry
-
From the Manager sidebar tab, click Manage Field Data Entries.
-
Click the Sub Single Field menu.
-
Expand the Workflows menu and click your assigned workflow. On the Sub Single Field page, the Field List panel will list all names of dropdown box/back, selection box/back, or recurring fields of the workflow.
-
Click the field name from the Field List panel.
-
Click the subfield name from the Sub Data Field panel.
-
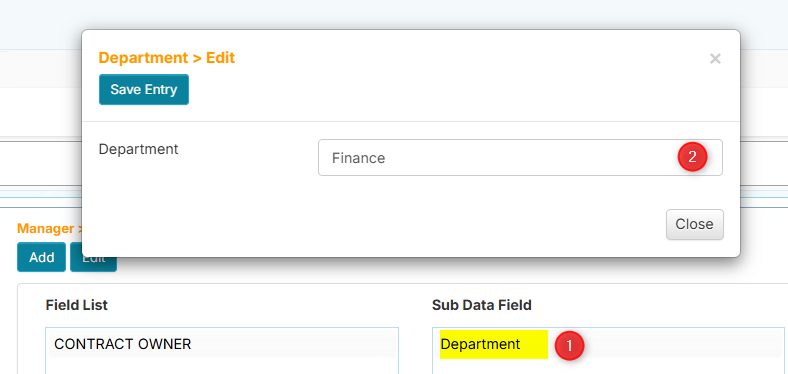
On the Data Field Values panel, double-click the value or click the value then click the Edit button. The Edit entry window will appear.
-
Enter the new value then click the Save Entry button when done.
How to Delete a Sub Single Field Entry
-
From the Manager sidebar tab, click Manage Field Data Entries.
-
Click the Sub Single Field menu.
-
Expand the Workflows menu and click your assigned workflow. On the Sub Single Field page, the Field List panel will list all names of dropdown box/back, selection box/back, or recurring fields of the workflow.
-
Click the field name from the Field List panel.
-
Click the subfield name from the Sub Data Field panel.
-
On the Data Field Values panel, find a value with the suffix (0).
tipOnly values with a (0) suffix can be deleted. This means there are no records using this value and it is safe to delete.
-
Click the Delete button. The Delete window will appear.
-
Click the Remove Entry button. A confirmation message will appear.
-
Click Yes to proceed or click No to cancel.
Sub Multi Field
The Sub Multi Field menu allows you to add, edit, or remove values from a second level child dropdown that contains multiple fields. This child dropdown field can be a subfield of a dropdown box/back, selection box/back, or recurring field.
Manage Sub Multi Field Lists:
In the following guides, if you are already on the Sub Multi Field page, you can skip to step 4.
- How to Add a New Sub Multi Field Entry
- How to Edit a Sub Multi Field Entry
- How to Delete a Sub Multi Field Entry
How to Add a New Sub Multi Field Entry
-
From the Manager sidebar tab, click Manage Field Data Entries.
-
Click the Sub Multi Field menu.
-
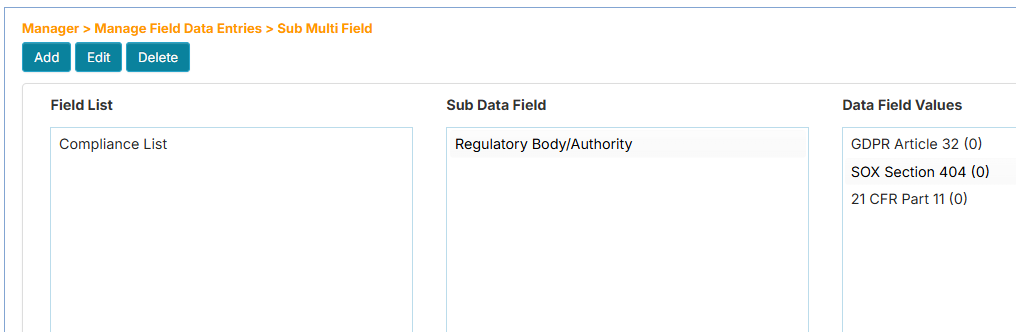
Expand the Workflows menu and click your assigned workflow. On the Sub Multi Field page, the Field List panel will list all names of dropdown box/back, selection box/back, or recurring fields of the workflow.
-
Click the field name from the Field List panel.
-
Click the subfield name from the Sub Data Field panel.
-
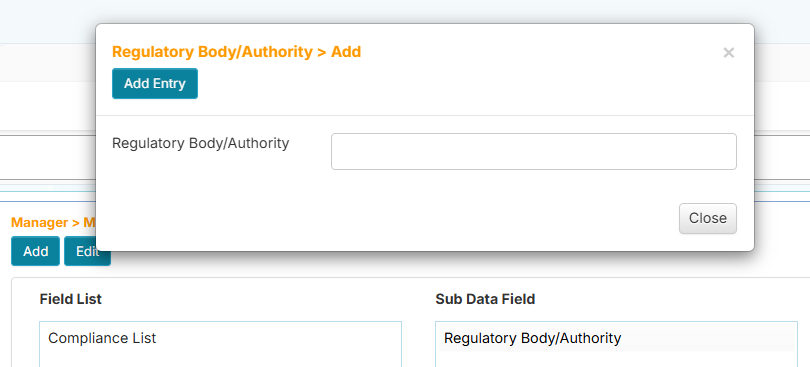
Click the Add button. The add window will appear.
-
Add the new entry then click the Add Entry button. The new item will be added and will have the suffix (0). This means the new entry has not been assigned to any record yet.
How to Edit a Sub Multi Field Entry
-
From the Manager sidebar tab, click Manage Field Data Entries.
-
Click the Sub Multi Field menu.
-
Expand the Workflows menu and click your assigned workflow. On the Sub Multi Field page, the Field List panel will list all names of dropdown box/back, selection box/back, or recurring fields of the workflow.
-
Click the field name from the Field List panel.
-
Click the subfield name from the Sub Data Field panel.
-
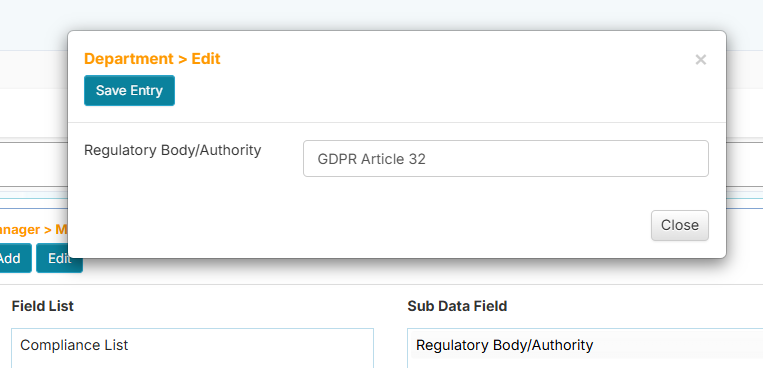
On the Data Field Values panel, double-click the value or click the value then click the Edit button. The Edit entry window will appear.
-
Enter the new value then click the Save Entry button when done.
How to Delete a Sub Multi Field Entry
-
From the Manager sidebar tab, click Manage Field Data Entries.
-
Click the Sub Multi Field menu.
-
Expand the Workflows menu and click your assigned workflow. On the Sub Multi Field page, the Field List panel will list all names of dropdown box/back, selection box/back, or recurring fields of the workflow.
-
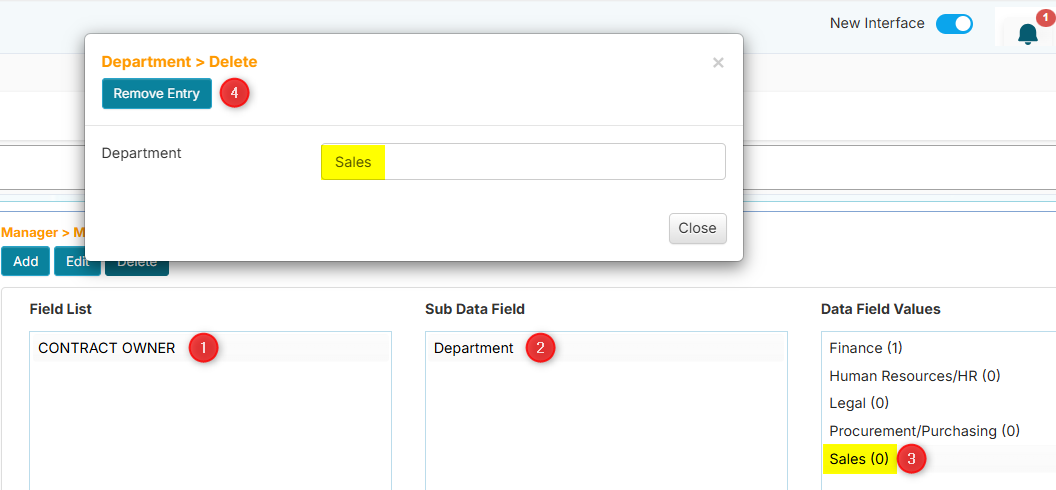
Click the field name from the Field List panel.
-
Click the subfield name from the Sub Data Field panel.
-
On the Data Field Values panel, find a value with the suffix (0).
tipOnly values with a (0) suffix can be deleted. This means there are no records using this value and it is safe to delete.
-
Click the Delete button. The Delete window will appear.
-
Click the Remove Entry button. A confirmation message will appear.
-
Click Yes to proceed or click No to cancel.